Abstract
Our project is Sketchy Rendering, a stylized shader that attempts to mimic how artists convey tone, depth, and lighting through simple strokes. The shader uses tonal art maps, which are collections of images that are organized according to the tone and mipmap level. Tonal art maps are governed by special rules that guarantee spatial and temporal coherence when they’re applied while making sure the render is as faithful to a human sketch as possible. An extra addition to our shader is drawing an outline around our object, which further enhances the hand-drawn effect. The shader is implemented as a webapp using the THREE.js and GLSL frameworks. Besides applying our custom shader, the webapp also allows the user to dynamically update various parameters such as lighting, geometry, and texture.
Technical Approach
Generation of Tonal Art Maps
We mimic shading through the use of Tonal Art Maps. Tonal Art Maps are similar to mipmaps, but in addition to containing images for different mipmap levels, it also contains images for different tones. Darker tones correspond to denser placement of strokes, and all the strokes in a lighter tone must appear in the darker tone.
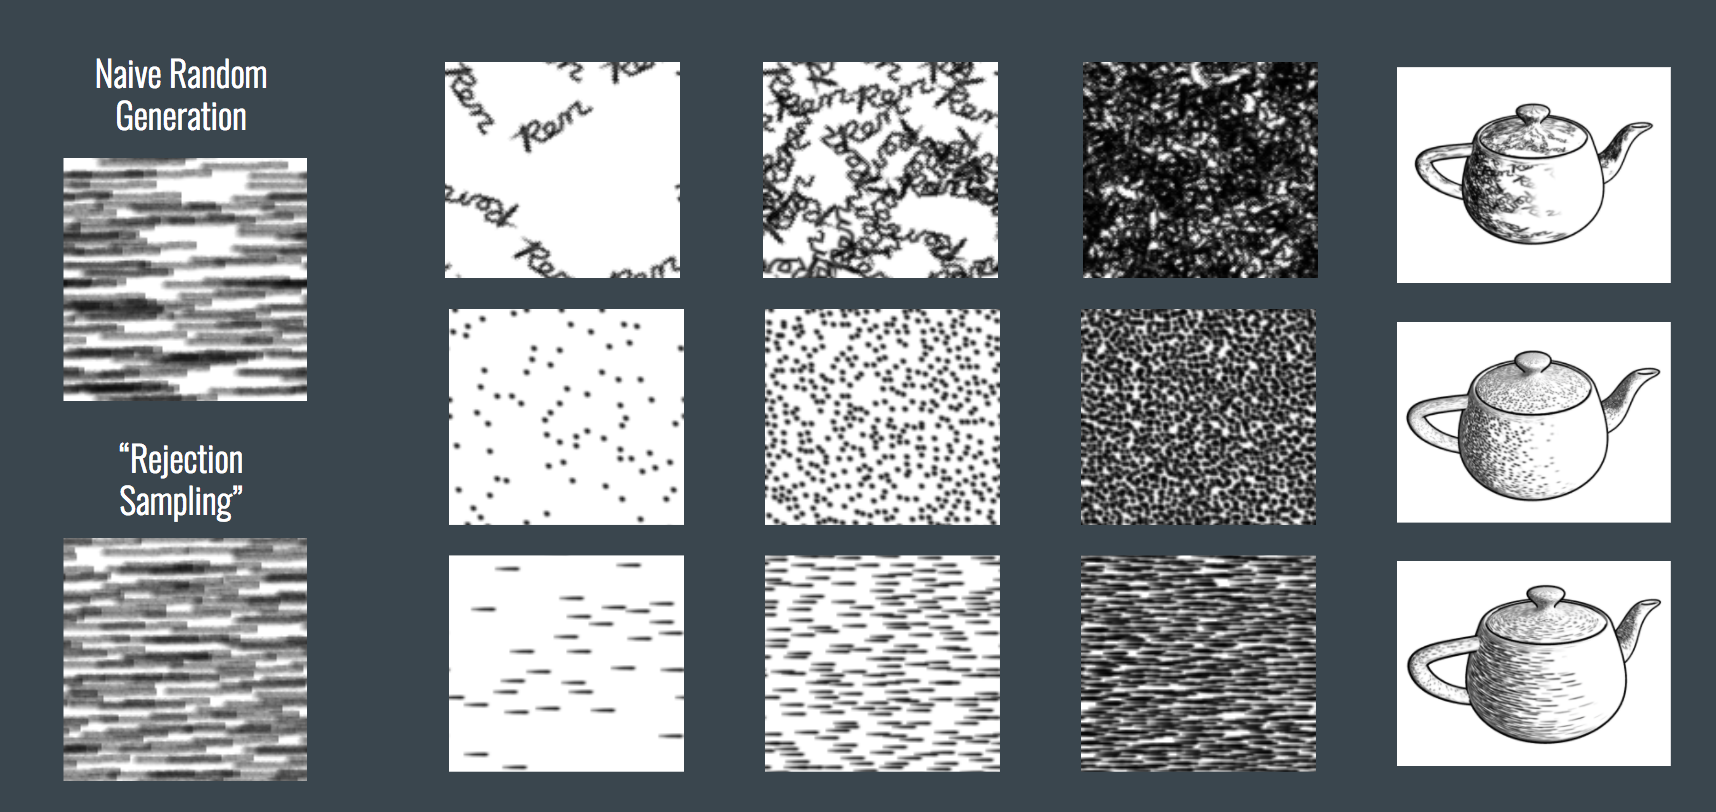
Some of our textures were computer-generated. We wrote a Python script to randomly generate textures given some input "stroke" image. Naively randomly placing strokes resulted in odd clumps of strokes, which were not perceived as random nor similar to real sketches. In order to combat this clumping, we implemented a sort of rejection sampling, in which a stroke placement was rejected if it would be placed in a location with an above average amount of noise. While this method still occasionally resulted in some apparent clustering at lighter tone levels, it generalized well compared to methods like stratified sampling, since we needed to be able to gradually add arbitrary numbers of strokes.
generate_tam(stroke, toneLevels):
	numStrokes = 0
	while numStrokes < max(toneLevels)
		point = sample_point()
		if avg_brightness(boundingBox) > avg_brightness(canvas):
			draw_stroke(point)
			if (numStrokes in toneLevels):
				save(canvas)
			numStrokes++
We also created a number of manually drawn textures, since random generation limited us to textures consisting of many small stroke markings. To ensure that our textures lined up at the edges, we wrote a script to wrap drawn textures around.
Problems
- The most challenging part for the randomly generated textures was fine tuning the parameters of tones. The quality of the shader depended a lot on the number of strokes we chose for eadh tone, so a lot of time was spent experimenting with that.
- For manually drawn textures, it was difficult to create natural looking textures that lined up on the edges. The method we eventually came up with did line up the edges, but often made the edges too dark. This also took a lot of trial and error to practice drawing nice textures.
Interpolation
We calculated the tone of each fragment using the Blinn-Phong shading model. The brightness resulting from this calculation was transformed into a value between 0 and 3, with 0 corresponding to the lightest tone and 3 to the darkest. We used 4 total tones, so to make sure that the transition between tones looked smooth and continuous, we linearly interpolated between neighboring tones to determine the color of each pixel.
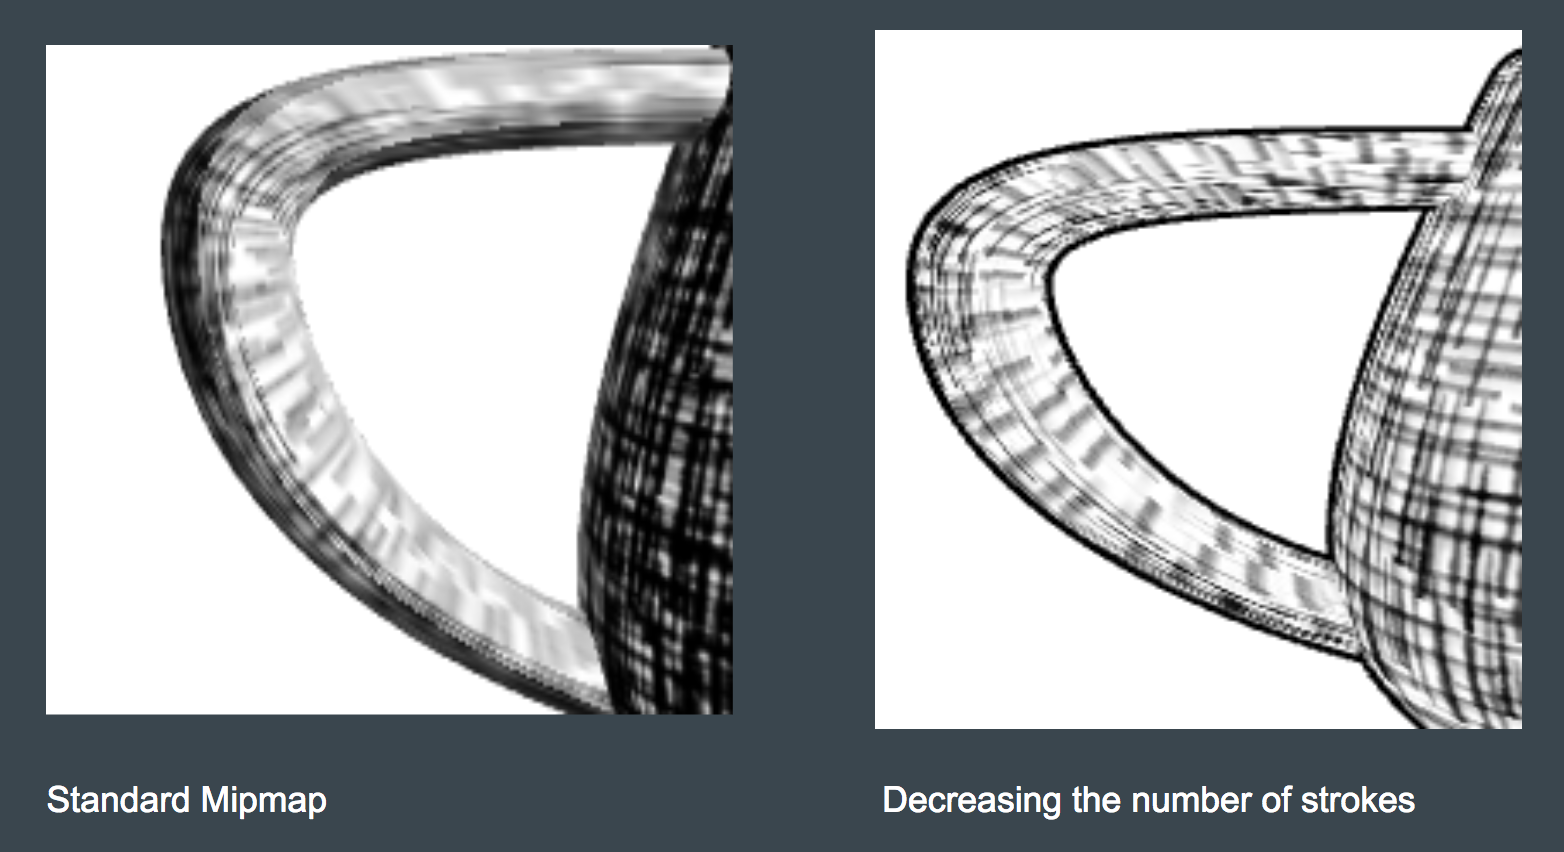
The usual method of mipmapping, in which "far away" pixels are shaded using lower resolution versions of the texture, does not fit a hatching shader very well. Real artists use the same resolution of hatches throughout an entire artwork. Our mipmap levels were cropped versions of the larger texture. After calculating the mipmap level, we linearly interpolated between the two nearest levels. In this way, the final color of a point is linear interpolation between tones and mipmap levels.
Problems
- The biggest problem we faced was GLSL's limit on how many textures you can import. For this reason, we restricted ourselves to four tones and four mipmap levels. We did work a little on mipmaps that were contained entirely in one texture so that we could use more levels, but we did not have time to get this fully working.
- We also ran into a problem with quality of meshes. In some meshes, the texture became so skewed that the shading became very unrealistic. We did not explore ways to correct this, so our shader only really works well for relatively continuous meshes.
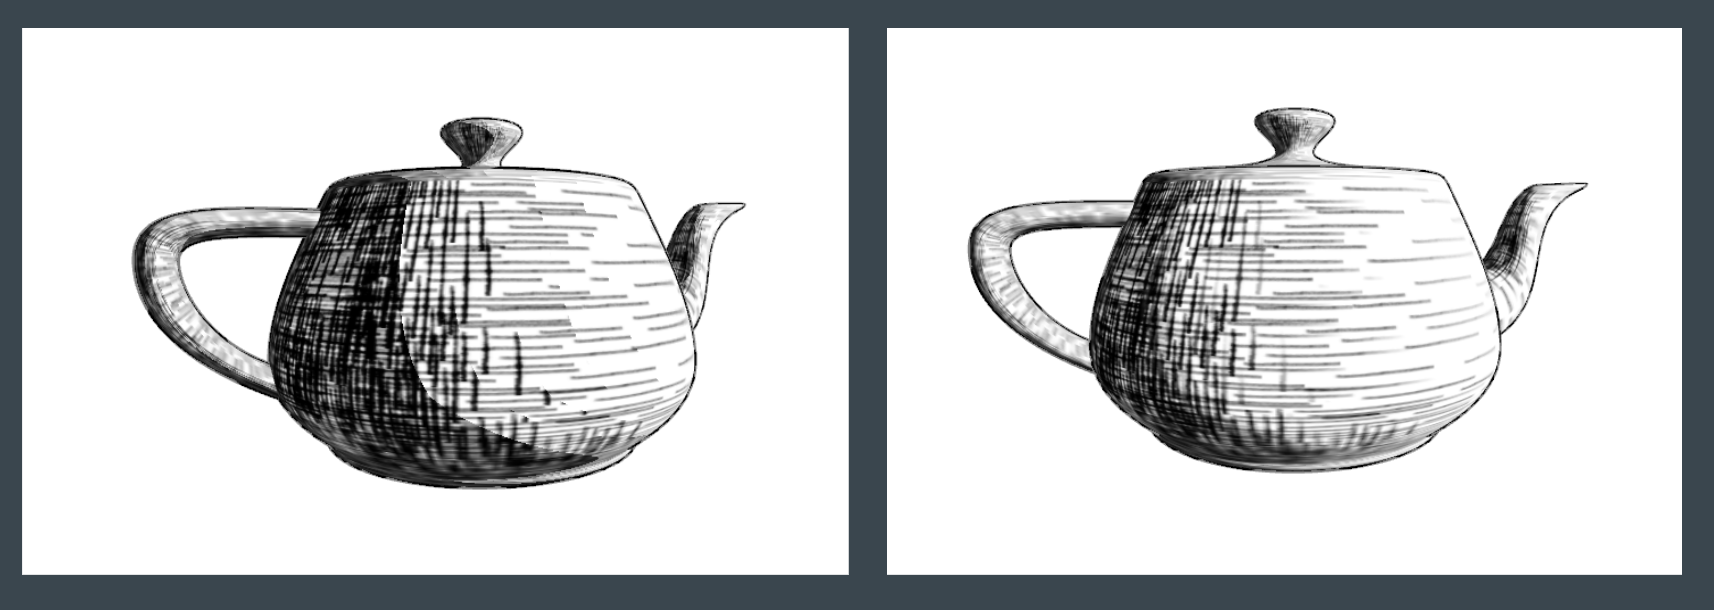
Outline Drawing
In real sketches, artists often draw an outline of an object before shading it in. In order to draw an outline around an object, we first created a slightly larger duplicate of the object. This object is shaded only when the surface normal points away from the camera. This prevents our duplicate object from obstructing the actual object we want to display. The only part we can see then, is the area that extends past our actual object due to the size difference. This area creates the effect of an outline.
To make the outline appear more similar to a sketched outline, we shaded the outline object using a texture colored to mimic pencil shading. We also made this outline slightly transparent in lighter areas of the pencil texture to mimic the graininess of a pencil
Problems
We did initially try to draw an outline by blackening pixels whose normals were approximately orthogonal to the camera. However, this resulted in overly thick outlines in "flatter" areas such as the top of a teapot.
Lessons learned
- Drawing is hard.
- The problems you have to deal with for photorealistic rendering are very different than those in realistic rendering. It's more about aesthetic than realism.
References
Contributions
- Serena: Wrote interpolation between mipmap levels and tone levels, wrote script to randomly generate TAMs
- Andy: Implemented GUI features and outline drawing
- Jacob: Drew manual mipmaps, worked on more advanced mipmapping, made video